Tischers Photoshop workflow
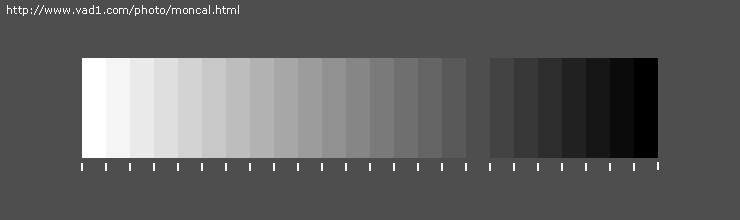
Adjust your monitor until you can distinguish between all shades of gray in the picture below.
Fred Mirandas "Shadow Recovery Pro" ($19.90)
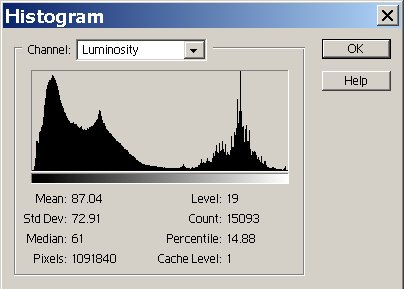
When shooting outdoors, you ideally want your brightest pixel as close to pure white as possible without being pure white. Pure white pixels often blink when playing back your pictures, or viewing your histogram. Once you reach pure white, anything brighter is washed out. This means your blue sky with white clouds, may just be all pure white. For a full explination on reading histograms check out Luminous-Landscapes.com
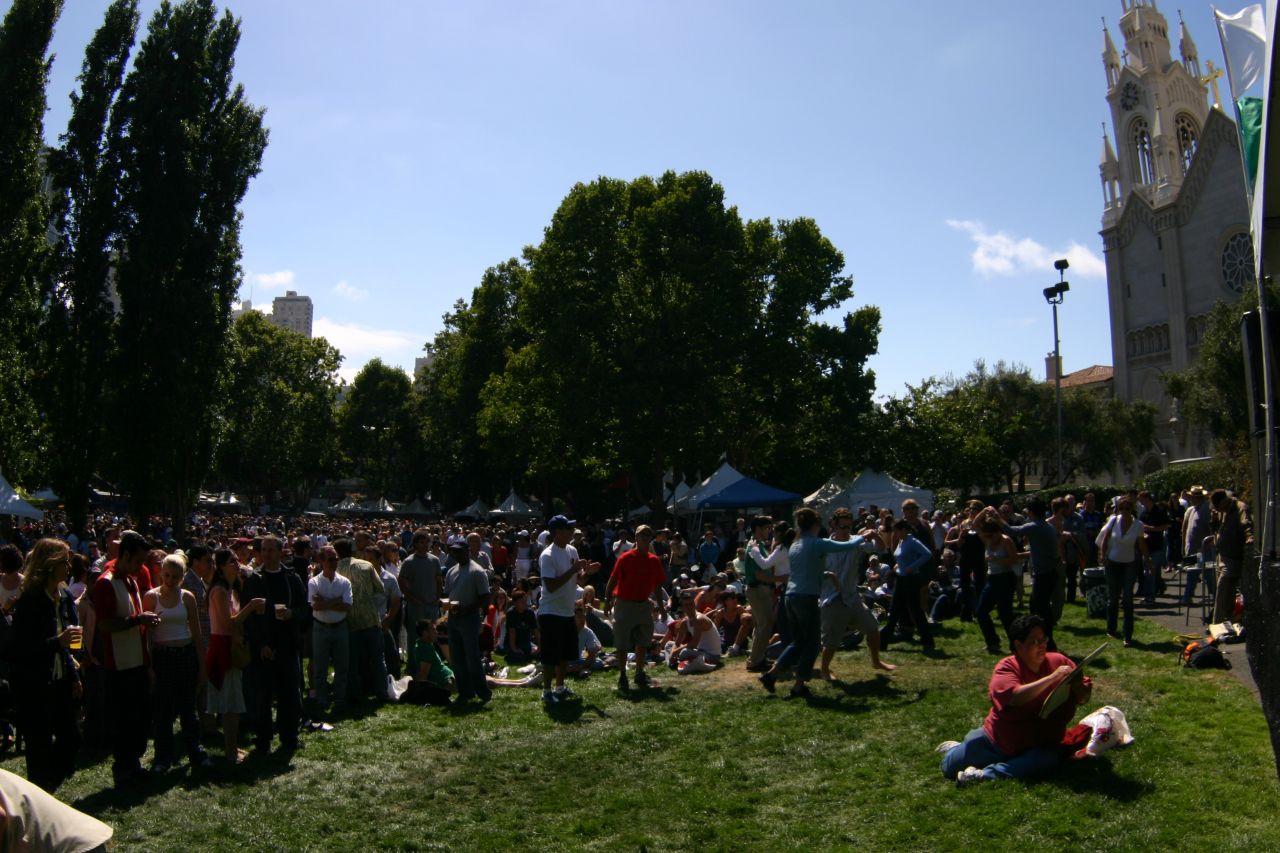
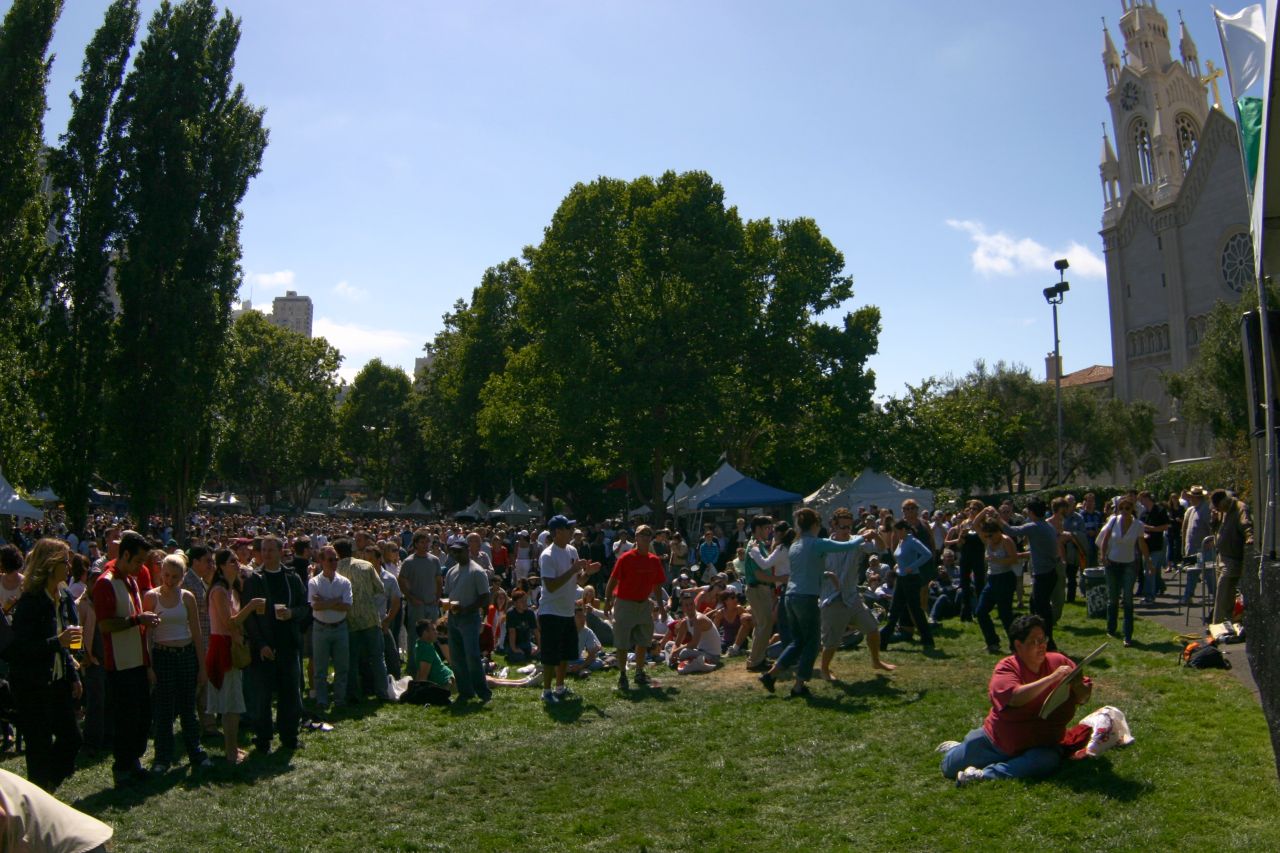
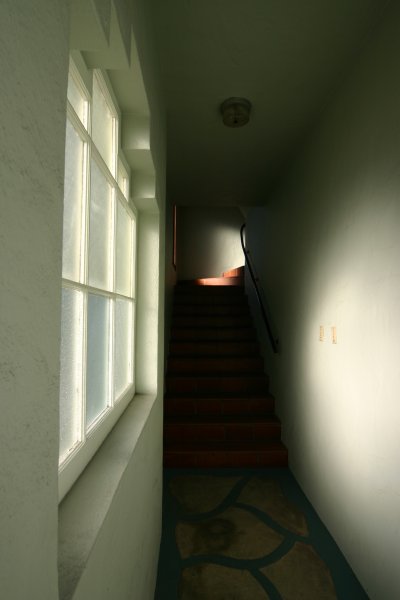
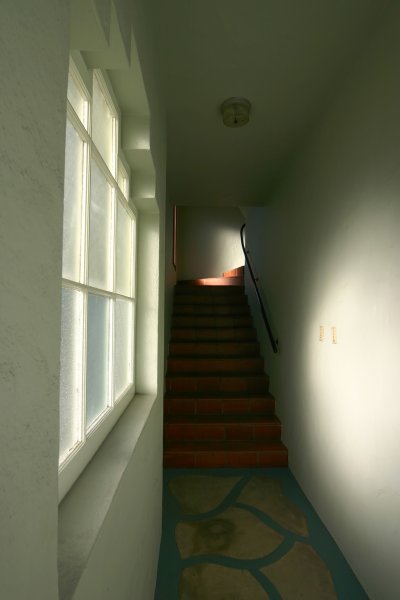
The picture below (left) shows the limitations of the dynamic range of my camera. It's near impossible to capture detail in the brightest cloud and the darkest shadow with one exposure. SR pro helps by enhancing only the shadowed regions. Since your monitor is not as bright as the original sunlight, it has far less range of brightness with which to display your picture. This is where the shadow recovery plug in works. It compresses the range of bright and dark pixels to fit within the range your monitor can display.
| Resized full frame image from Canon digital Rebel, 16mm fisheye | After SR Pro (similar to Sigmas "fill flash" processing) |
 Enlarge |
 Enlarge |
| 
|
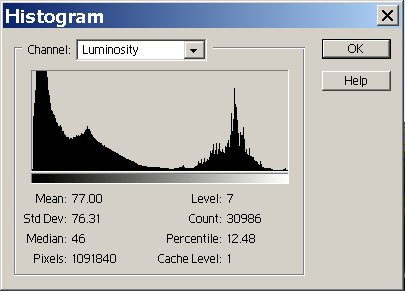
A histogram shows the distribution of bright and dark pixels. Dark pixles (0/255) are on the left, bright pixels(255/255) on the right. In the left picture you can see there is a huge pile of dark pixels. After the correction, the distribution of pixels is more uniform, and there are very few pure black pixels. A histogram is more meaningful to look at when judging exposure than seeing the actual image.
In the shot below, I changed the exposure until I had just a few pixels of pure white. As you can see the original image looks under exposed. When automatic exposure was used, the entire window was pure white. I used -2/3 exposure compensation to prevent the highlights in the window from being blown out.
| Resized full frame image from Canon digital Rebel, 16mm fisheye | After SR Pro (similar to Sigmas "fill flash" processing) |
 Enlarge |
 Enlarge |
Noise Ninja ($29.00)
Noise Ninja analyzes your picture and finds areas of uniform color. It uses these patches to profile the characteristics of your cameras noise, and eliminates it. It's amazing how effective it works, and it's fully automatic. The detail loss is almost impossible to detect once the image is processed.
With Noise Ninja you can now shoot at 800 Iso giving you 8 times faster shutter speed compared to 100. The slight detail you might loose from noise reduction will be greatly recovered by stopping your lens down to its sharpest region (around f/8). Or another way to look at the situation is, you will have 1/8th the blur by shooting 8 times faster shutter speeds!
| 100% crop from 8 Megapixel neg scan of Kodak Iso 800 Negative Film (very noisy) | After Noise Ninja |
 Enlarge |
 Enlarge |
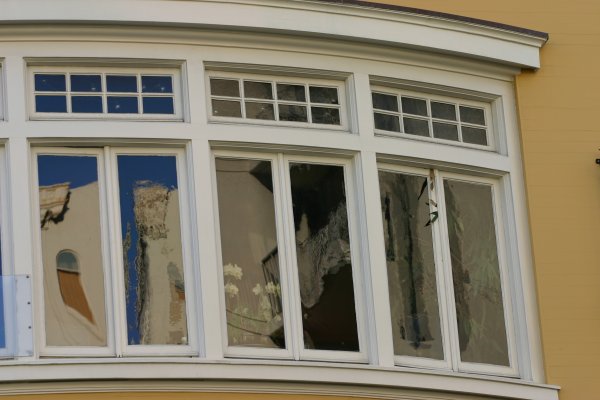
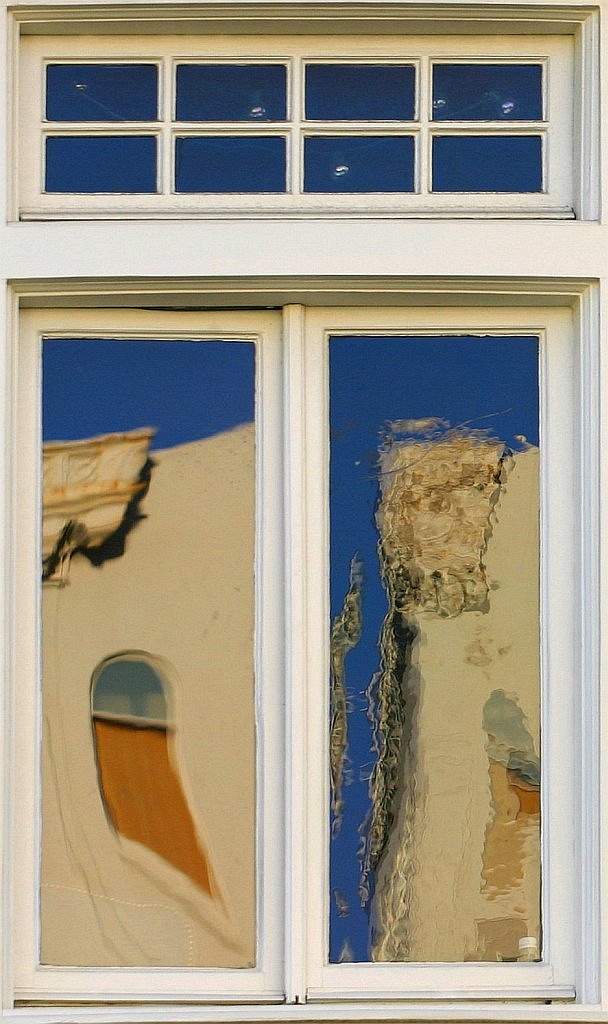
Correcting perspective with photoshop elements 2.0
| Before | After Perspective correction |
 Enlarge |
 Enlarge |
This method works well for composing reflections. It also helps to eliminate your reflection when photographing windows. Just take the picture at a slight angle, then correct the perspective in photoshop!
|